
Getting started
Quick start
- Install TrenchCalc from the App Store or Google Play.
- Open the app and tap Start Trench Setup.
- Enter length, base width, and depth. The length is the run of the trench, the base width is the bottom, and the depth is from the ground surface.
- Read the volume.
- Use the home button for culverts, cement, zones, and the other tools.
Switch between metric and imperial in the settings menu.
System requirements
- Android 9 (API 28) or higher, or iOS 17.0 or higher.
- 3 GB of RAM minimum, 4 GB recommended.
- About 200 MB for the app, with 2 GB of free storage recommended.
LiDAR site survey needs an iPhone 12 Pro or later, or an iPad Pro 11" or 12.9" (3rd generation or later). Some paid features need an internet connection.
Trench volume
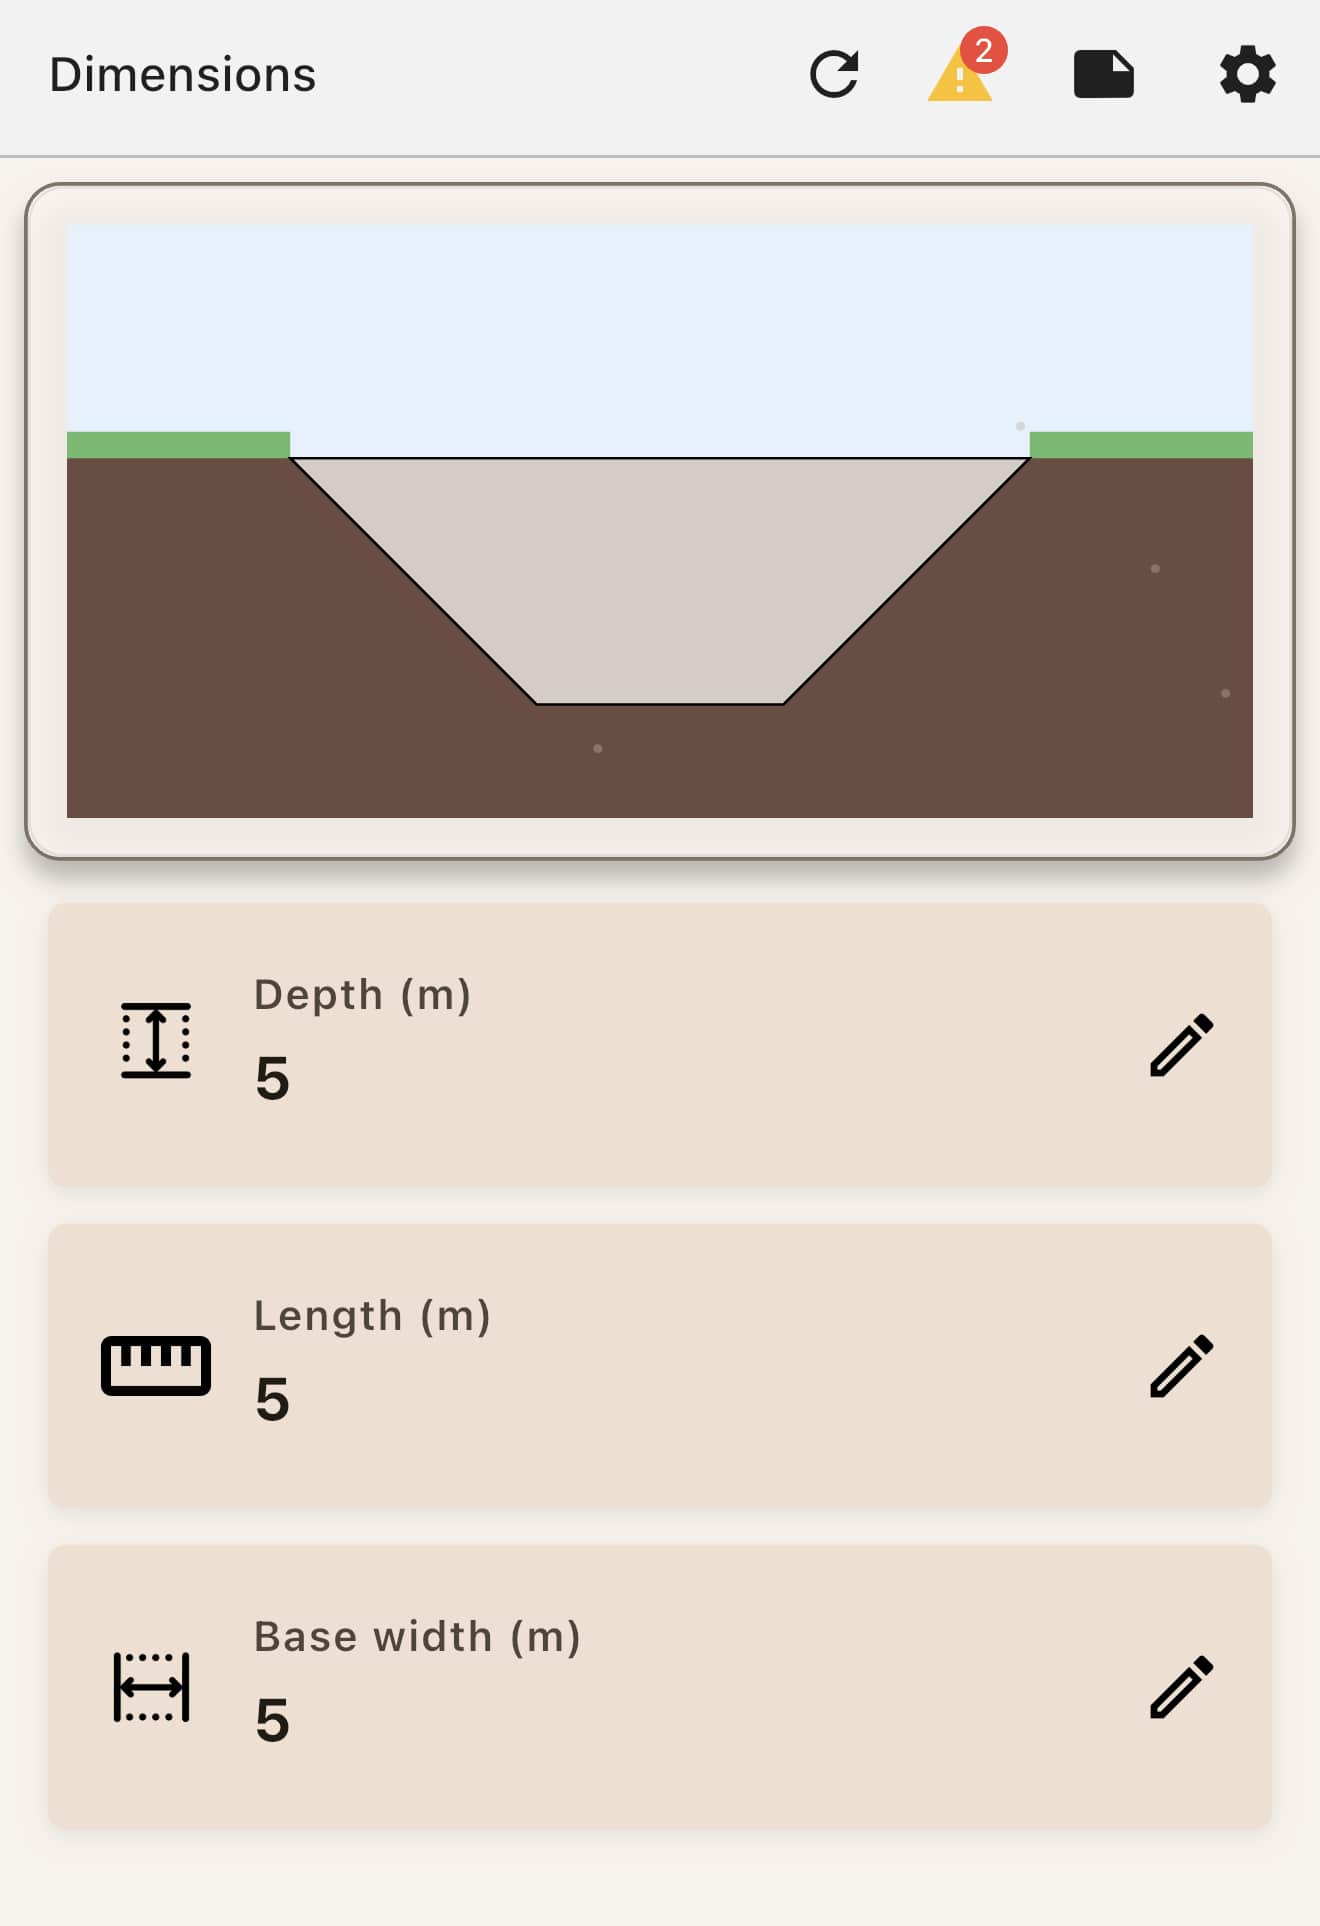
Volume is the core of the app. Three wall layouts are built in:
- Rectangular. A simple cross-section with a constant width.
- Trapezoidal. Battered side walls that taper.
- Benched. Stepped benches, at 1:1, for deeper excavations.
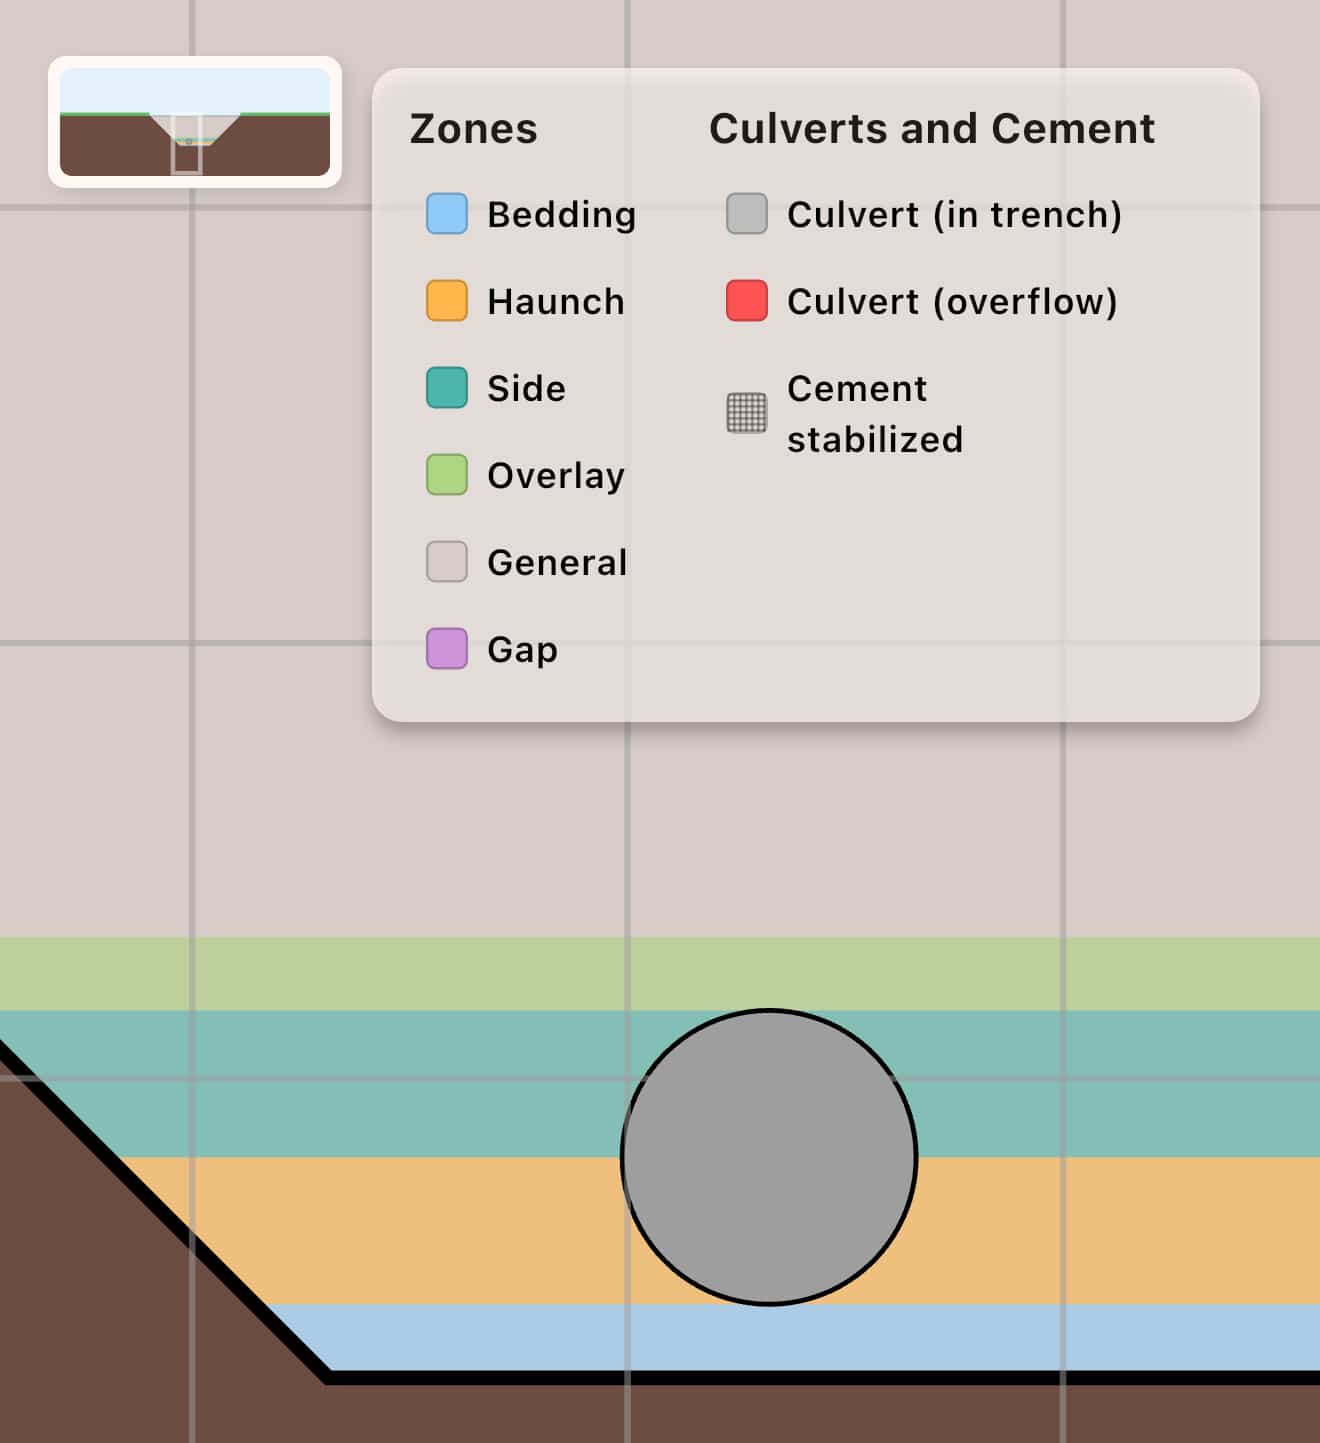
A single trench can be split into zones:
- Bed for the trench bed.
- Haunch for the side support.
- Side fill for the backfill.
- Overlay for the surface layer.
- Gap for the space between box culverts.
- General for everything else.
Use zones when each part of the trench takes a different material.
Tabs
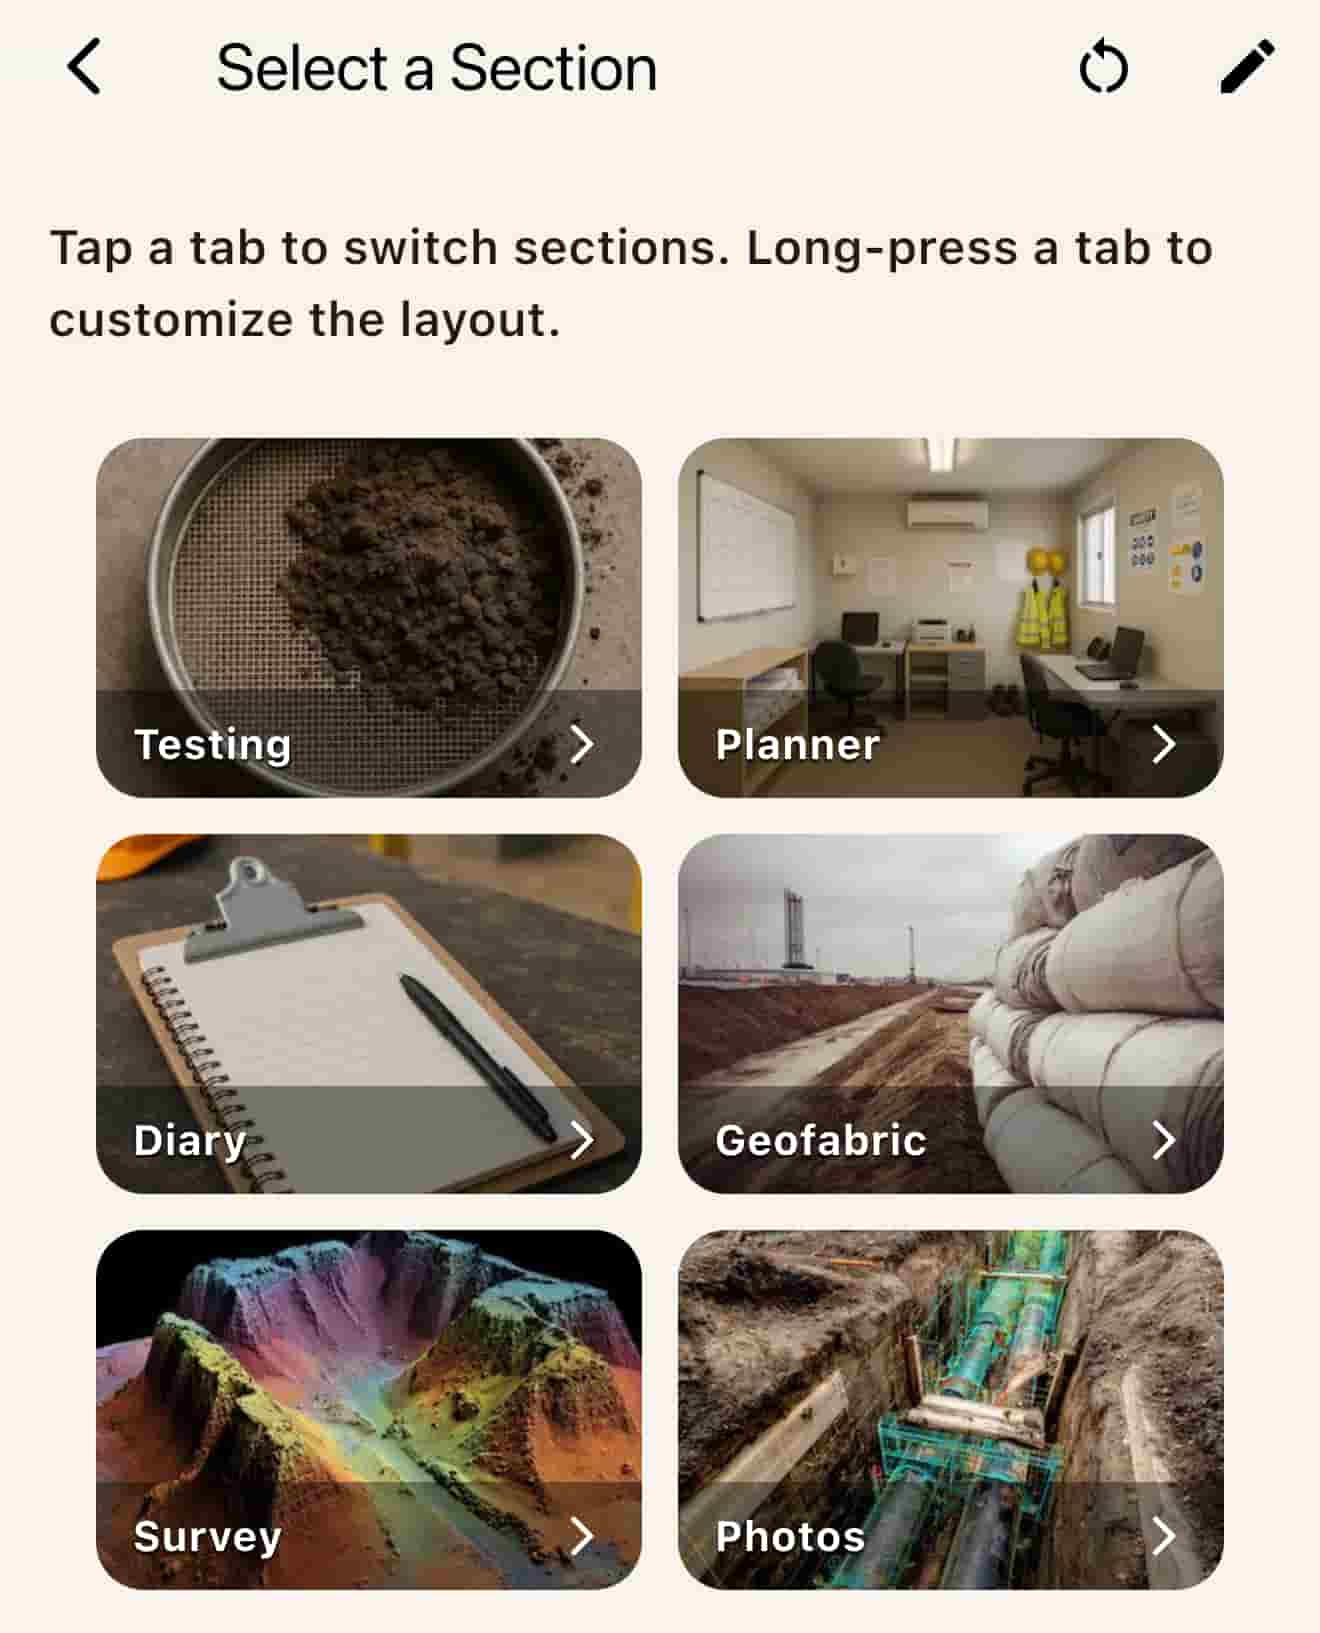
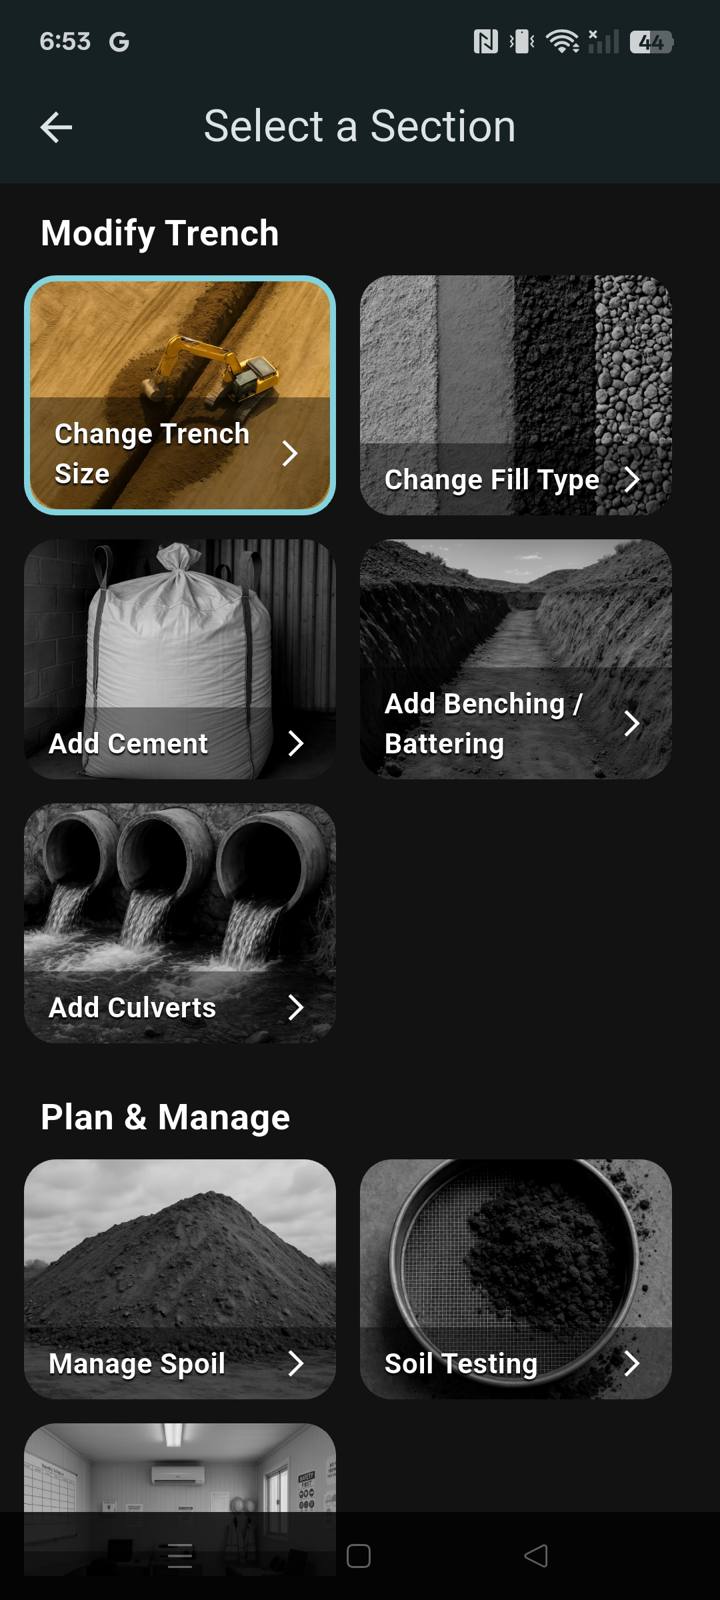
Features sit on 12 tabs across 3 pages you can rearrange. Free tabs are Basic, Fill, and Wall. The Lifetime purchase unlocks the other nine. A locked tab shows a lock icon.
Free tabs
Basic — change trench size. Depth, length, and base width in metres or feet, a live diagram, input checks, and a wizard for the first setup.
Fill — change fill type. Preset or custom material, density in kg/m³ or lb/ft³, a compaction factor, bedding and overlay depth, and per-zone fill for bed, haunch, side, overlay, gap, and general. Volumes update as you type.
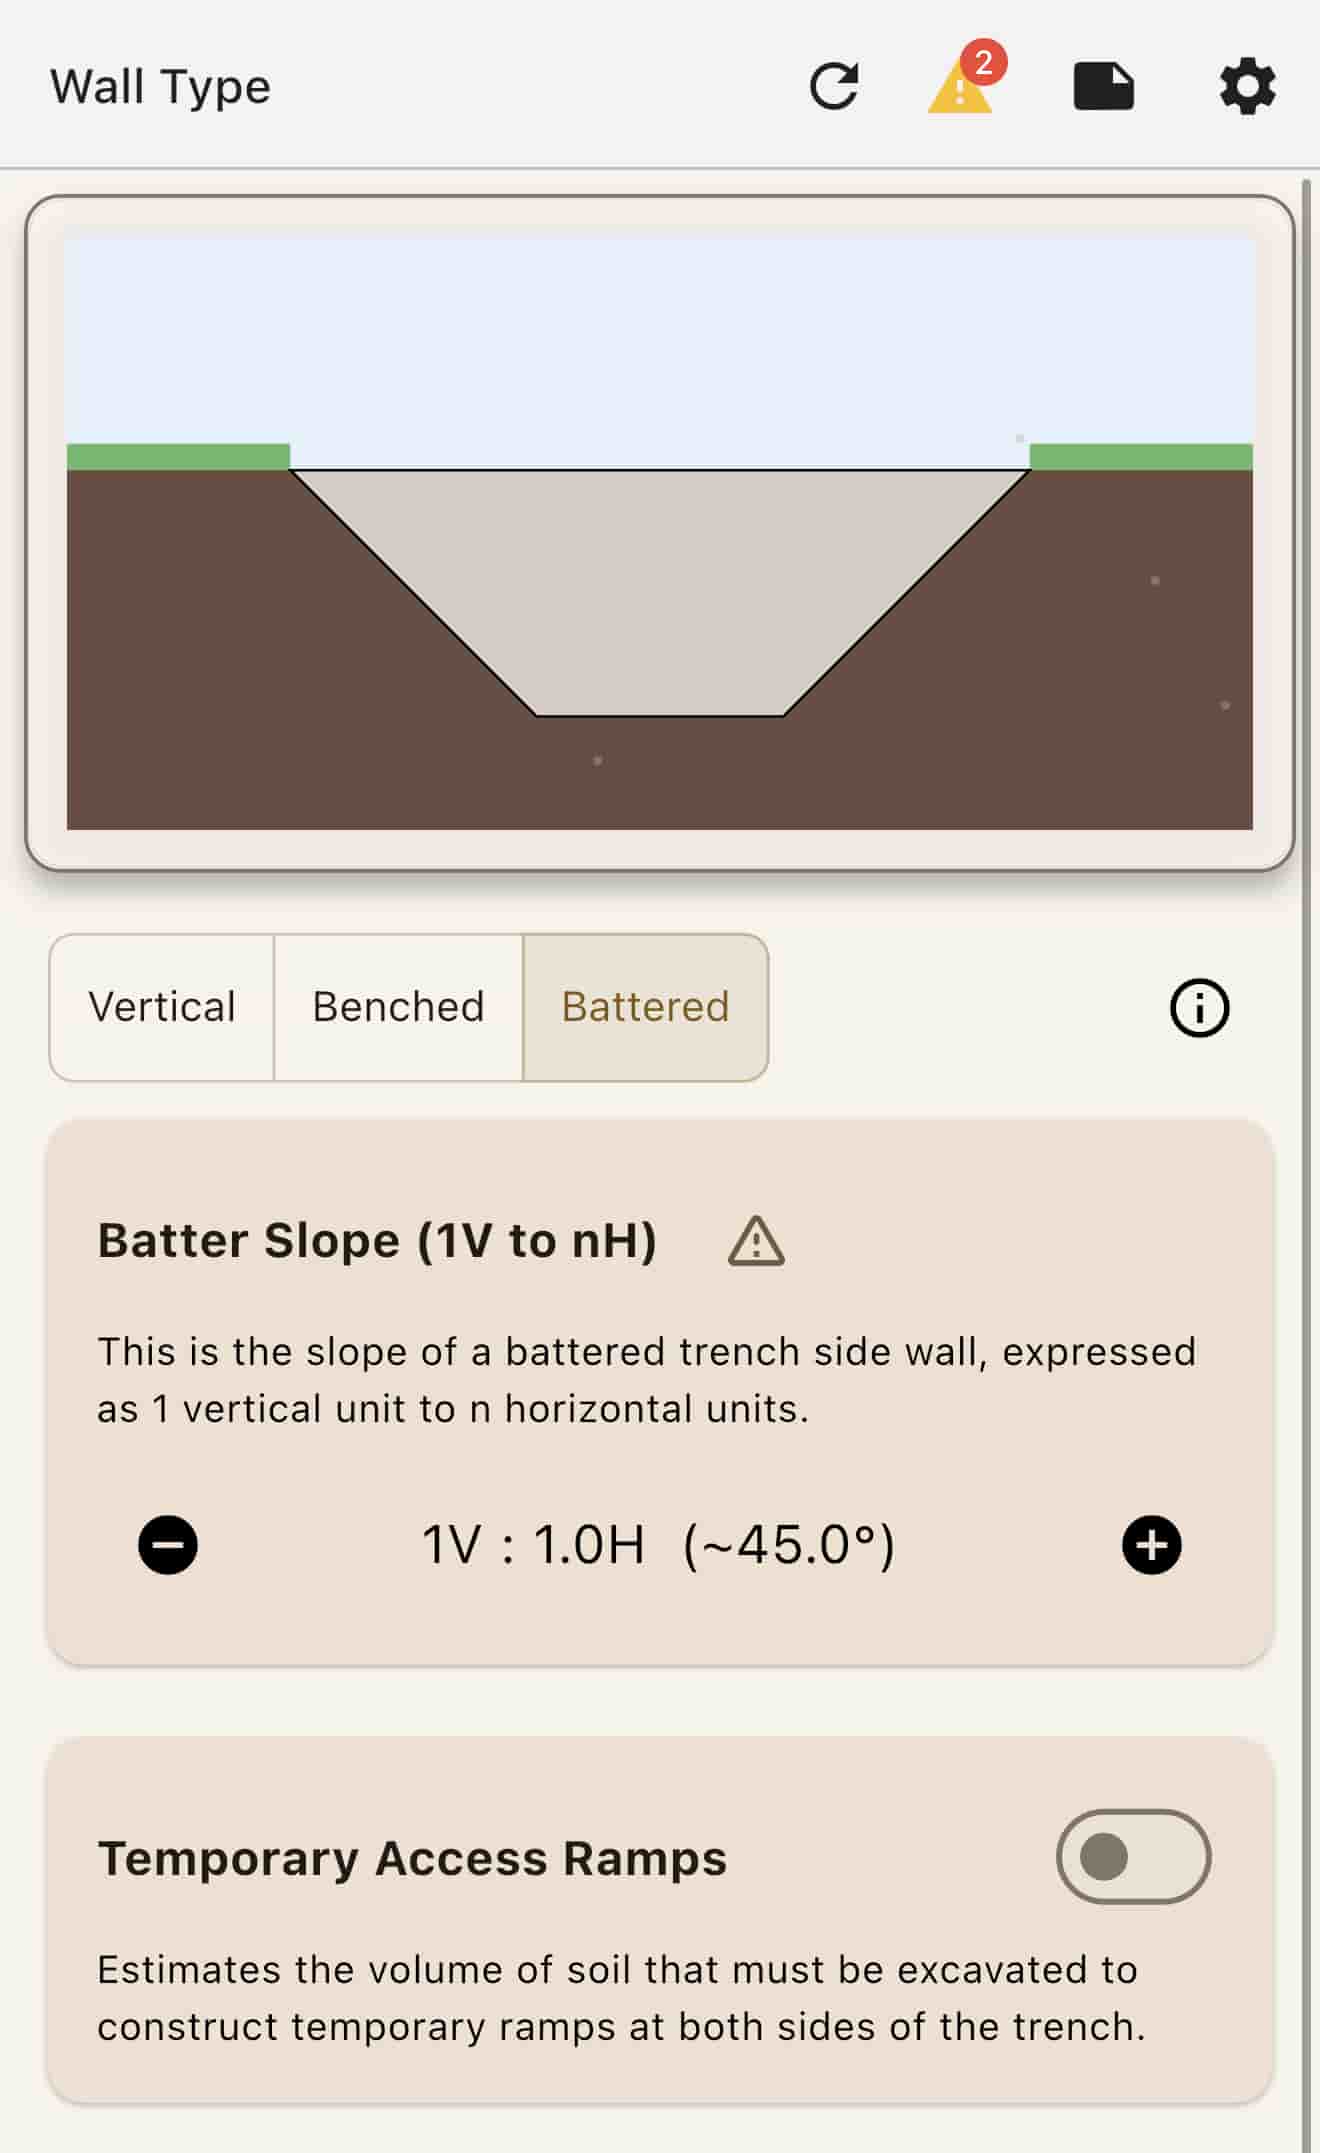
Wall — benching and battering. Vertical, benched, or battered walls. Set the bench step height, the batter slope as H:V, and a temporary ramp with its own volume. The diagram shows the wall you picked.
Lifetime tabs
Cement — add cement. A cement slider from 0 to 20 percent, per zone if zones are on, unconfined compressive strength, water to cement ratio, flowable fill, a weather advisory, cement mass and volume, and a soil type for the strength estimate. Strength is shown at 7 days and 28 days.
Culverts — add culverts. Round or box, a count, diameter or width and height, spacing, and distance to the walls. The diagram warns if they do not fit. The same warning shows on Testing, Spoil, and Planner.
Spoil — manage spoil. Spoil volume from the excavation, pile angle, height, base width, and toe distance, with an option to split the pile evenly on both sides. Each side shows volume, base width, height, and centre from the trench, plus the total.
Testing — soil testing. Compaction, particle size distribution, Atterberg limits, test volumes, foundation tests, and how often to test per lift or zone. The planner can schedule the tests.
Planner — construction planner. A timeline, a cost breakdown, productivity, a culvert installation rate, and mobilisation and demobilisation. Duration is split by activity. Cost categories are personal, plant, material, soil testing, logistics, and production.
Geofabric — geofabric lining. Surface area, roll size, overlap, wastage, number of rolls, and linear metres. It follows vertical, battered, and benched walls.
Survey — site survey. An AR camera scan, an on-device point cloud, volumes for stockpiles and trenches, scan quality, and a measurement history. It needs a LiDAR device. See Site survey.
Photos — photo documentation. Camera capture with a GPS tag, 28 built-in tags plus your own, a detail view, and annotation. See Photos.
On every trench
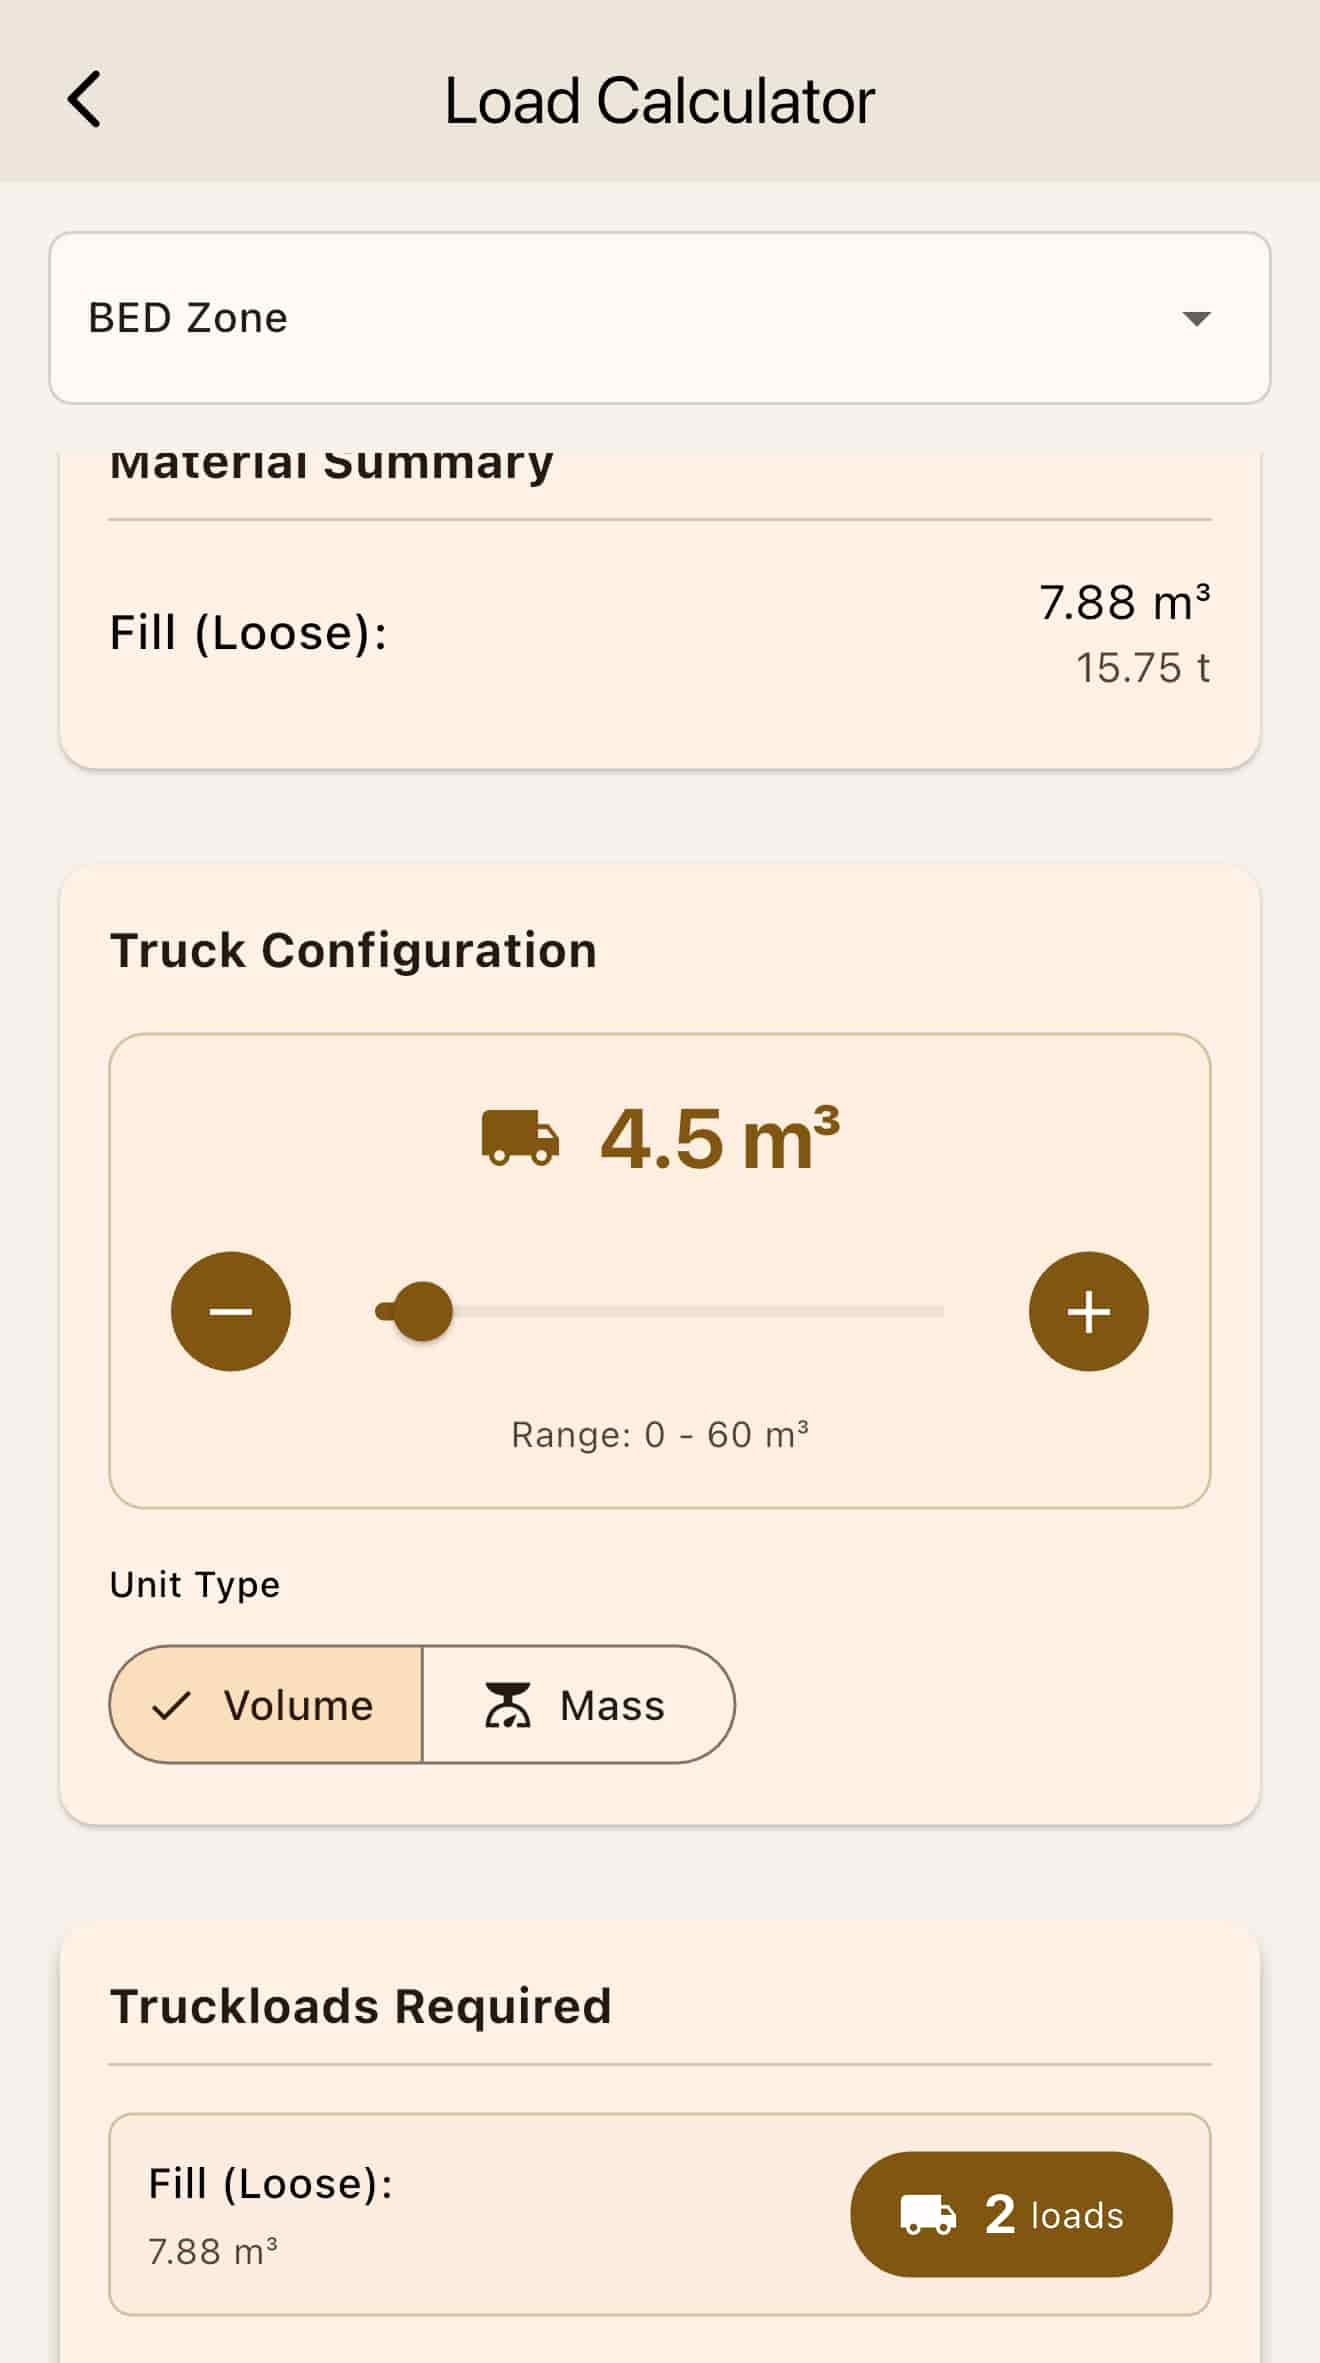
- Truck loads (free) counts how many loads move the trench or a stockpile, from the size of the truck.
- Watercart loads (Lifetime) appears when cement is on, and estimates the water for stabilisation.
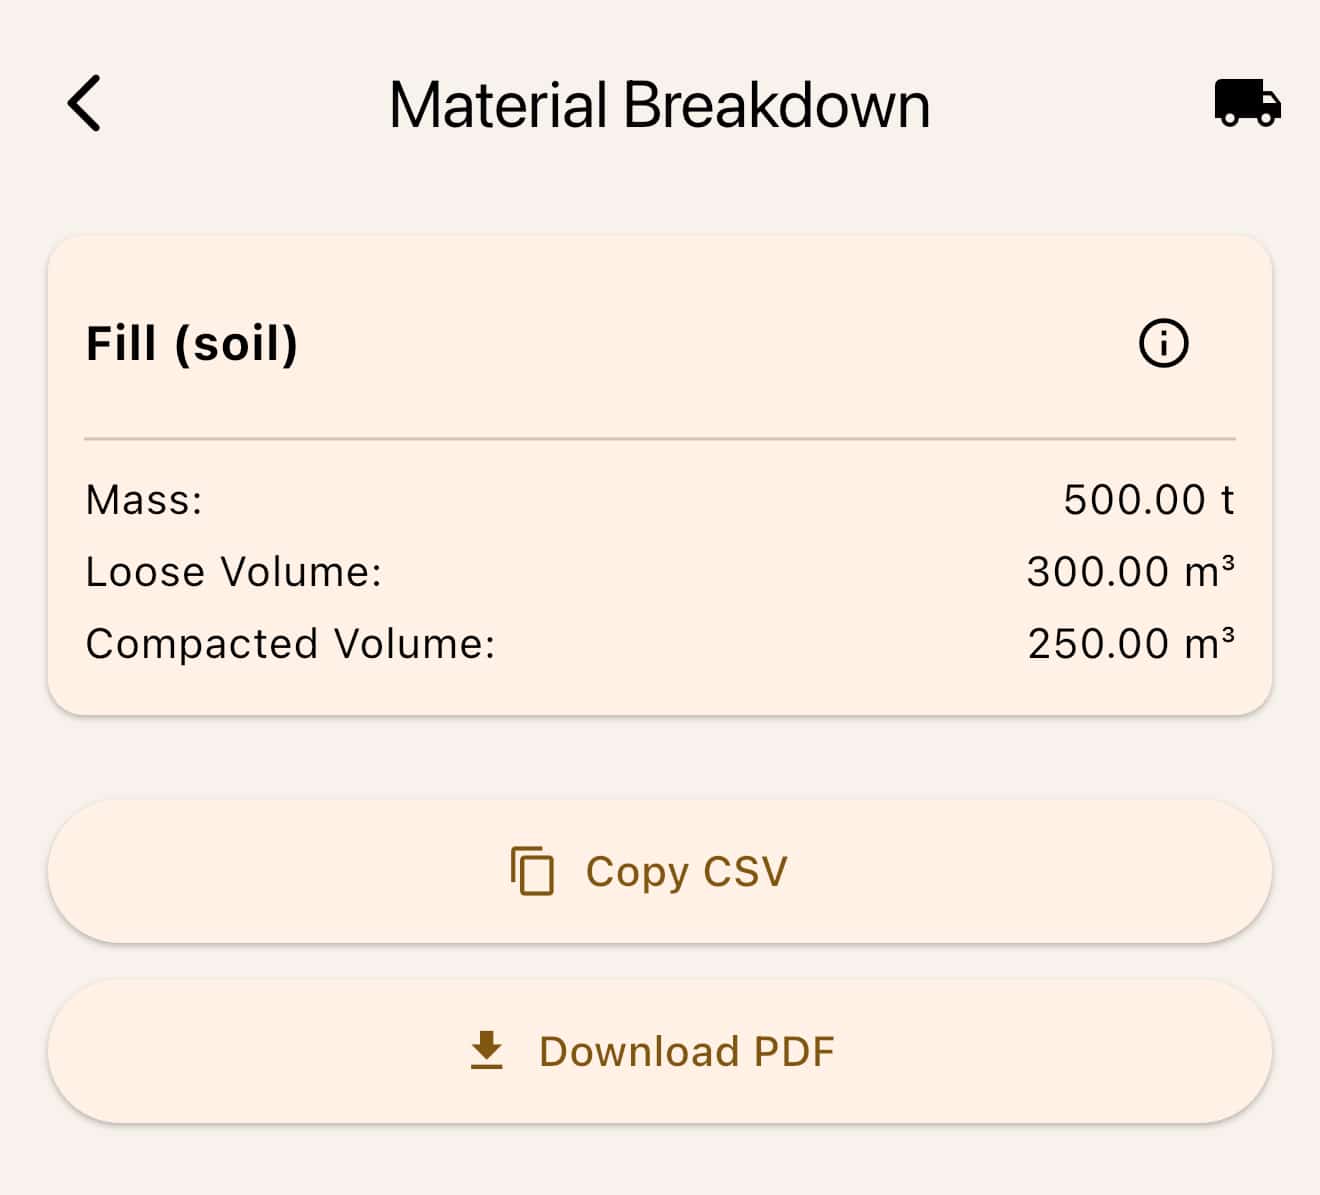
- Export writes out the material and zone breakdown, as volume and mass.
- Save and load trench setups, light and dark mode, live recalculation, diagrams on most tabs, and metric or imperial units.
Cement stabilisation
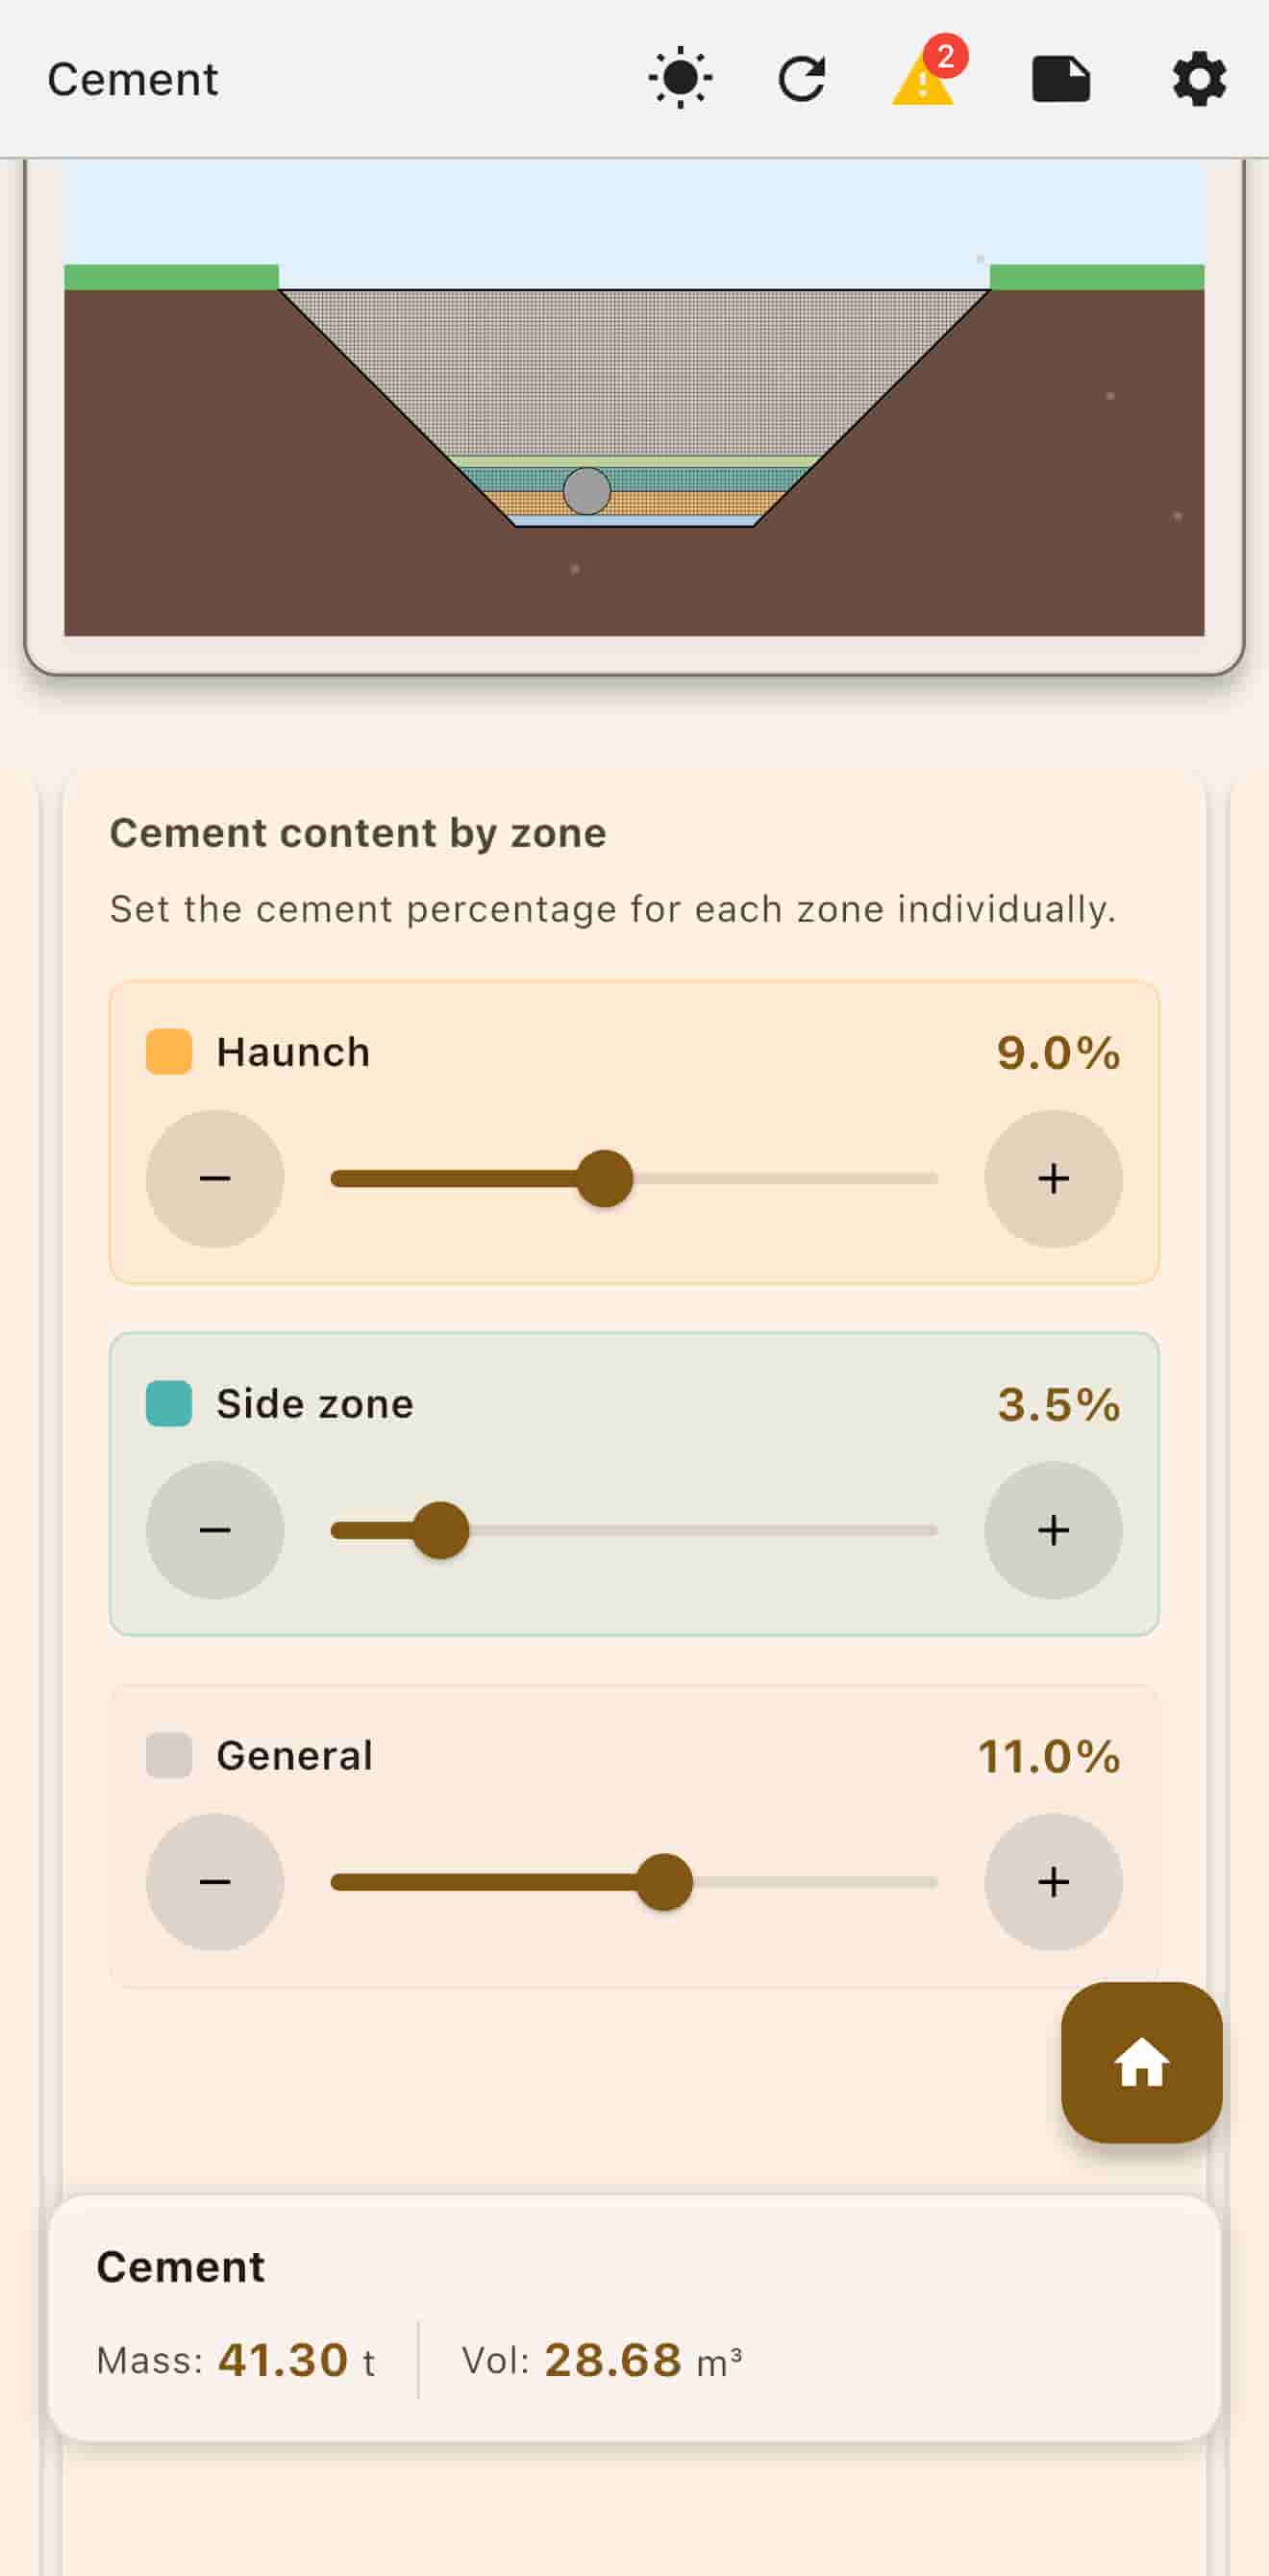
Stabilising with cement is there to raise strength and durability. The Cement tab estimates how much cement you need and what strength to expect.
Without zones
- Open the Cement tab.
- Move the slider from 0 to 20 percent.
- Read the cement total and mass, and the estimated strength.
- Adjust the water to cement ratio to see the flow of the mix.
With zones
- Open the Cement tab and choose which zones to stabilise.
- Set a cement percentage for each zone.
- Pick a zone and set its water to cement ratio.
- Read the 7-day and 28-day strength estimate for that zone.
The estimate uses soil type, cement content, and curing time. As an example from the guide, 5 percent cement in a clay is on the order of 0.5 MPa at 7 days and 1.2 MPa at 28 days. Treat that as an illustration, not a design value for your soil.
The mix design reports dry soil weight, cement weight, water, and the volume of the stabilised mix.
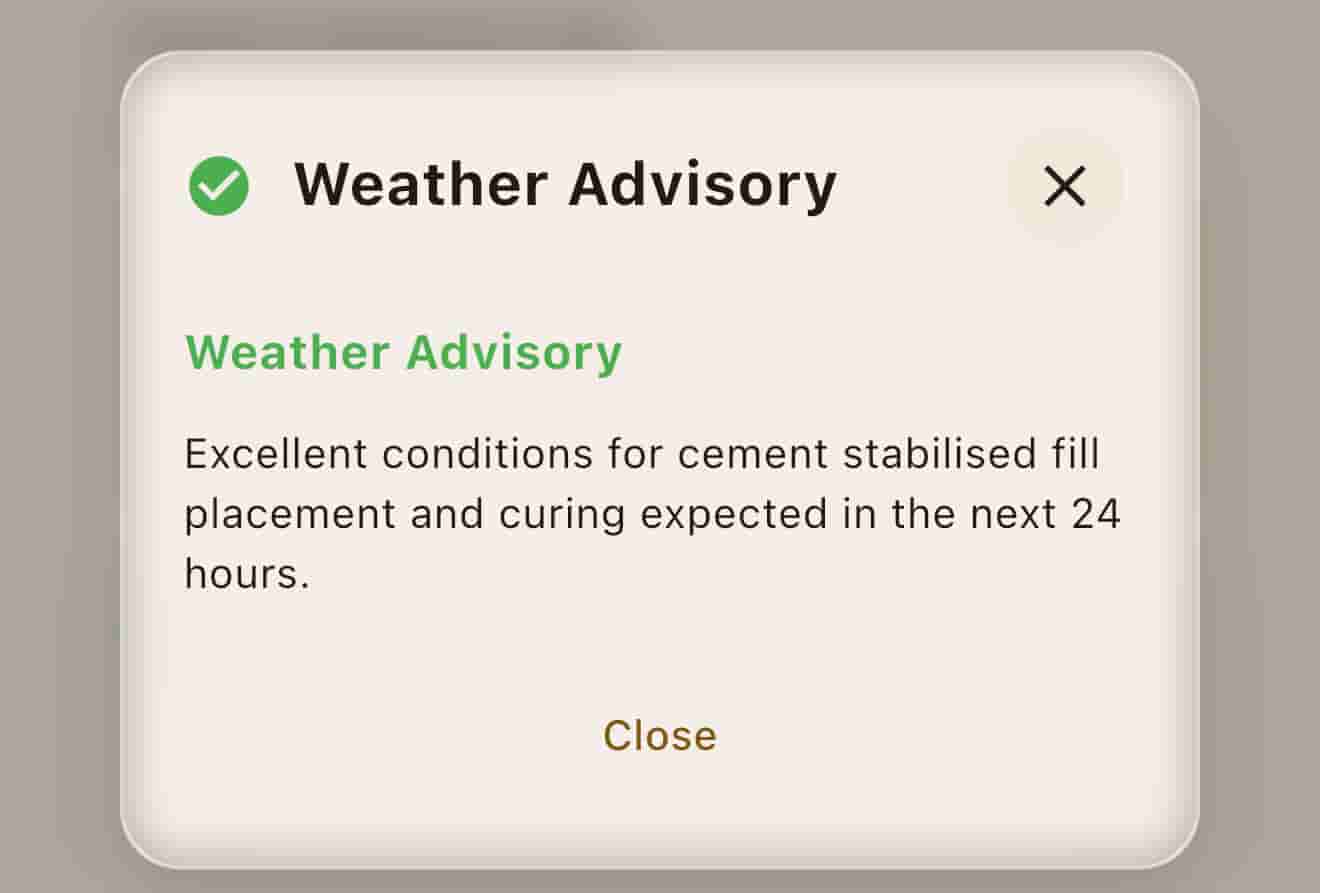
The weather advisory on the same tab checks humidity, temperature, rain, and related conditions, and says whether today looks suitable for stabilising.
Culverts
- Open the Culverts tab and start the round or box wizard.
- Enter the number of culverts.
- Enter a diameter, or the length and width of a box.
- Set the clearance from the left wall.
- If there is more than one, set the spacing. A single culvert skips this step.
- Turn on fill zoning if you need it. Otherwise finish and review the diagram.
- If zoning is on, set the bedding thickness and the overlay thickness, then finish.
- The close control returns to the Culverts tab with the fields filled in.
The app works out spacing, bedding, cover, and the volume left after the culverts are subtracted.
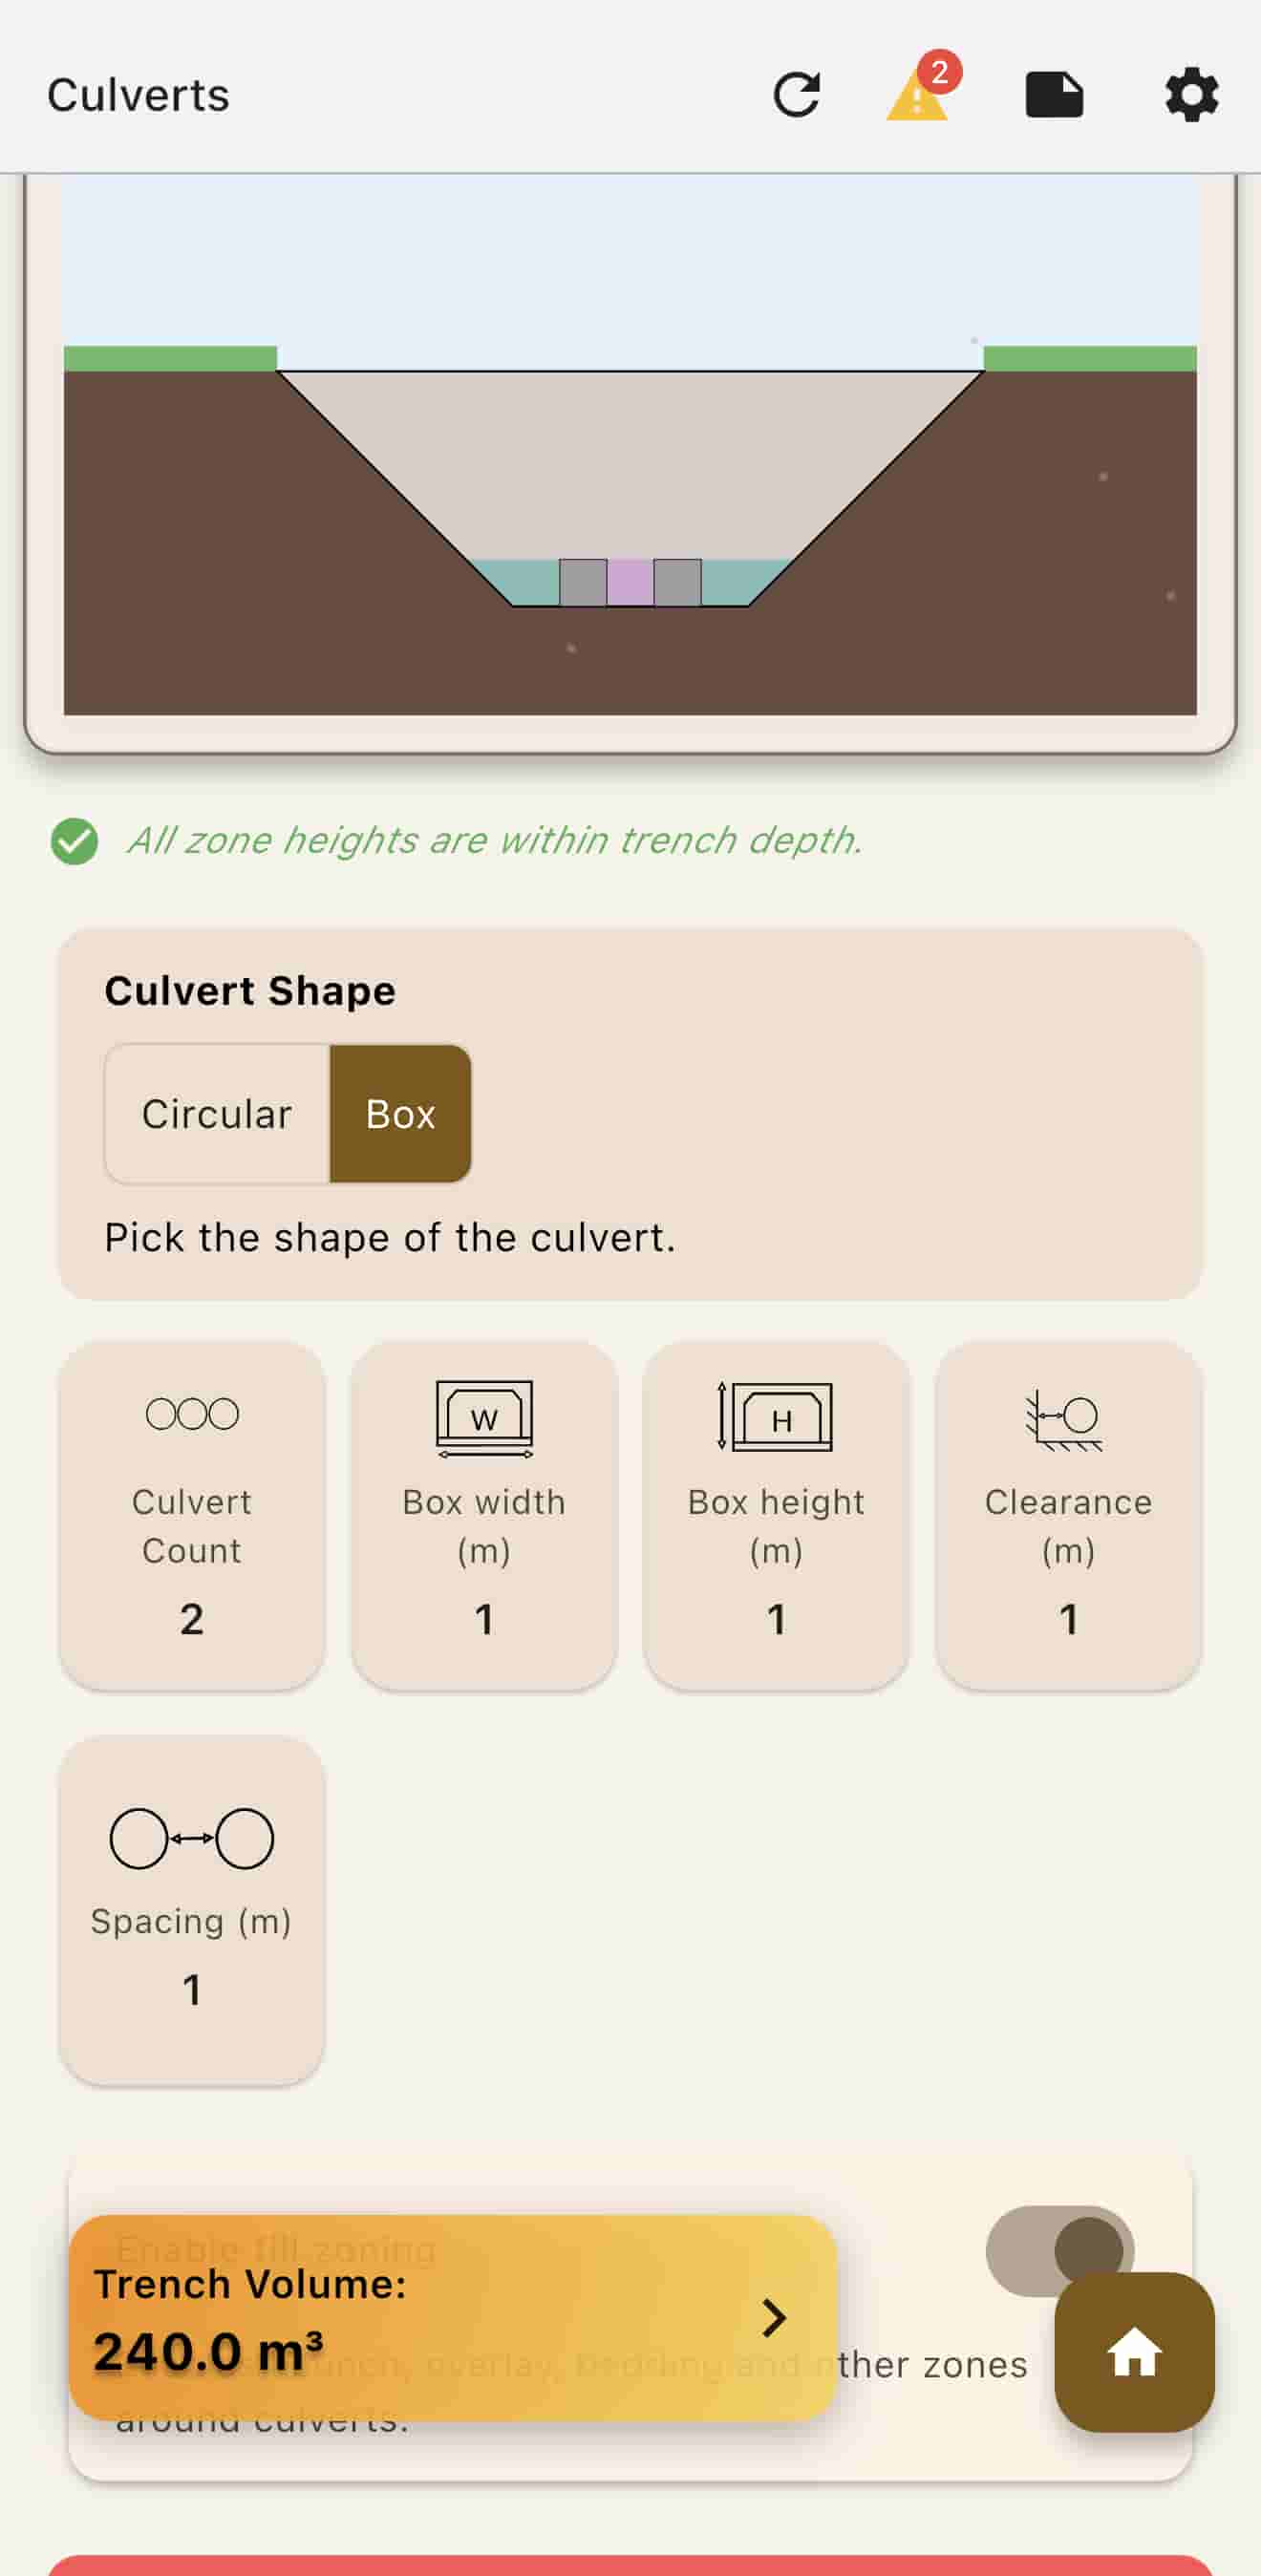
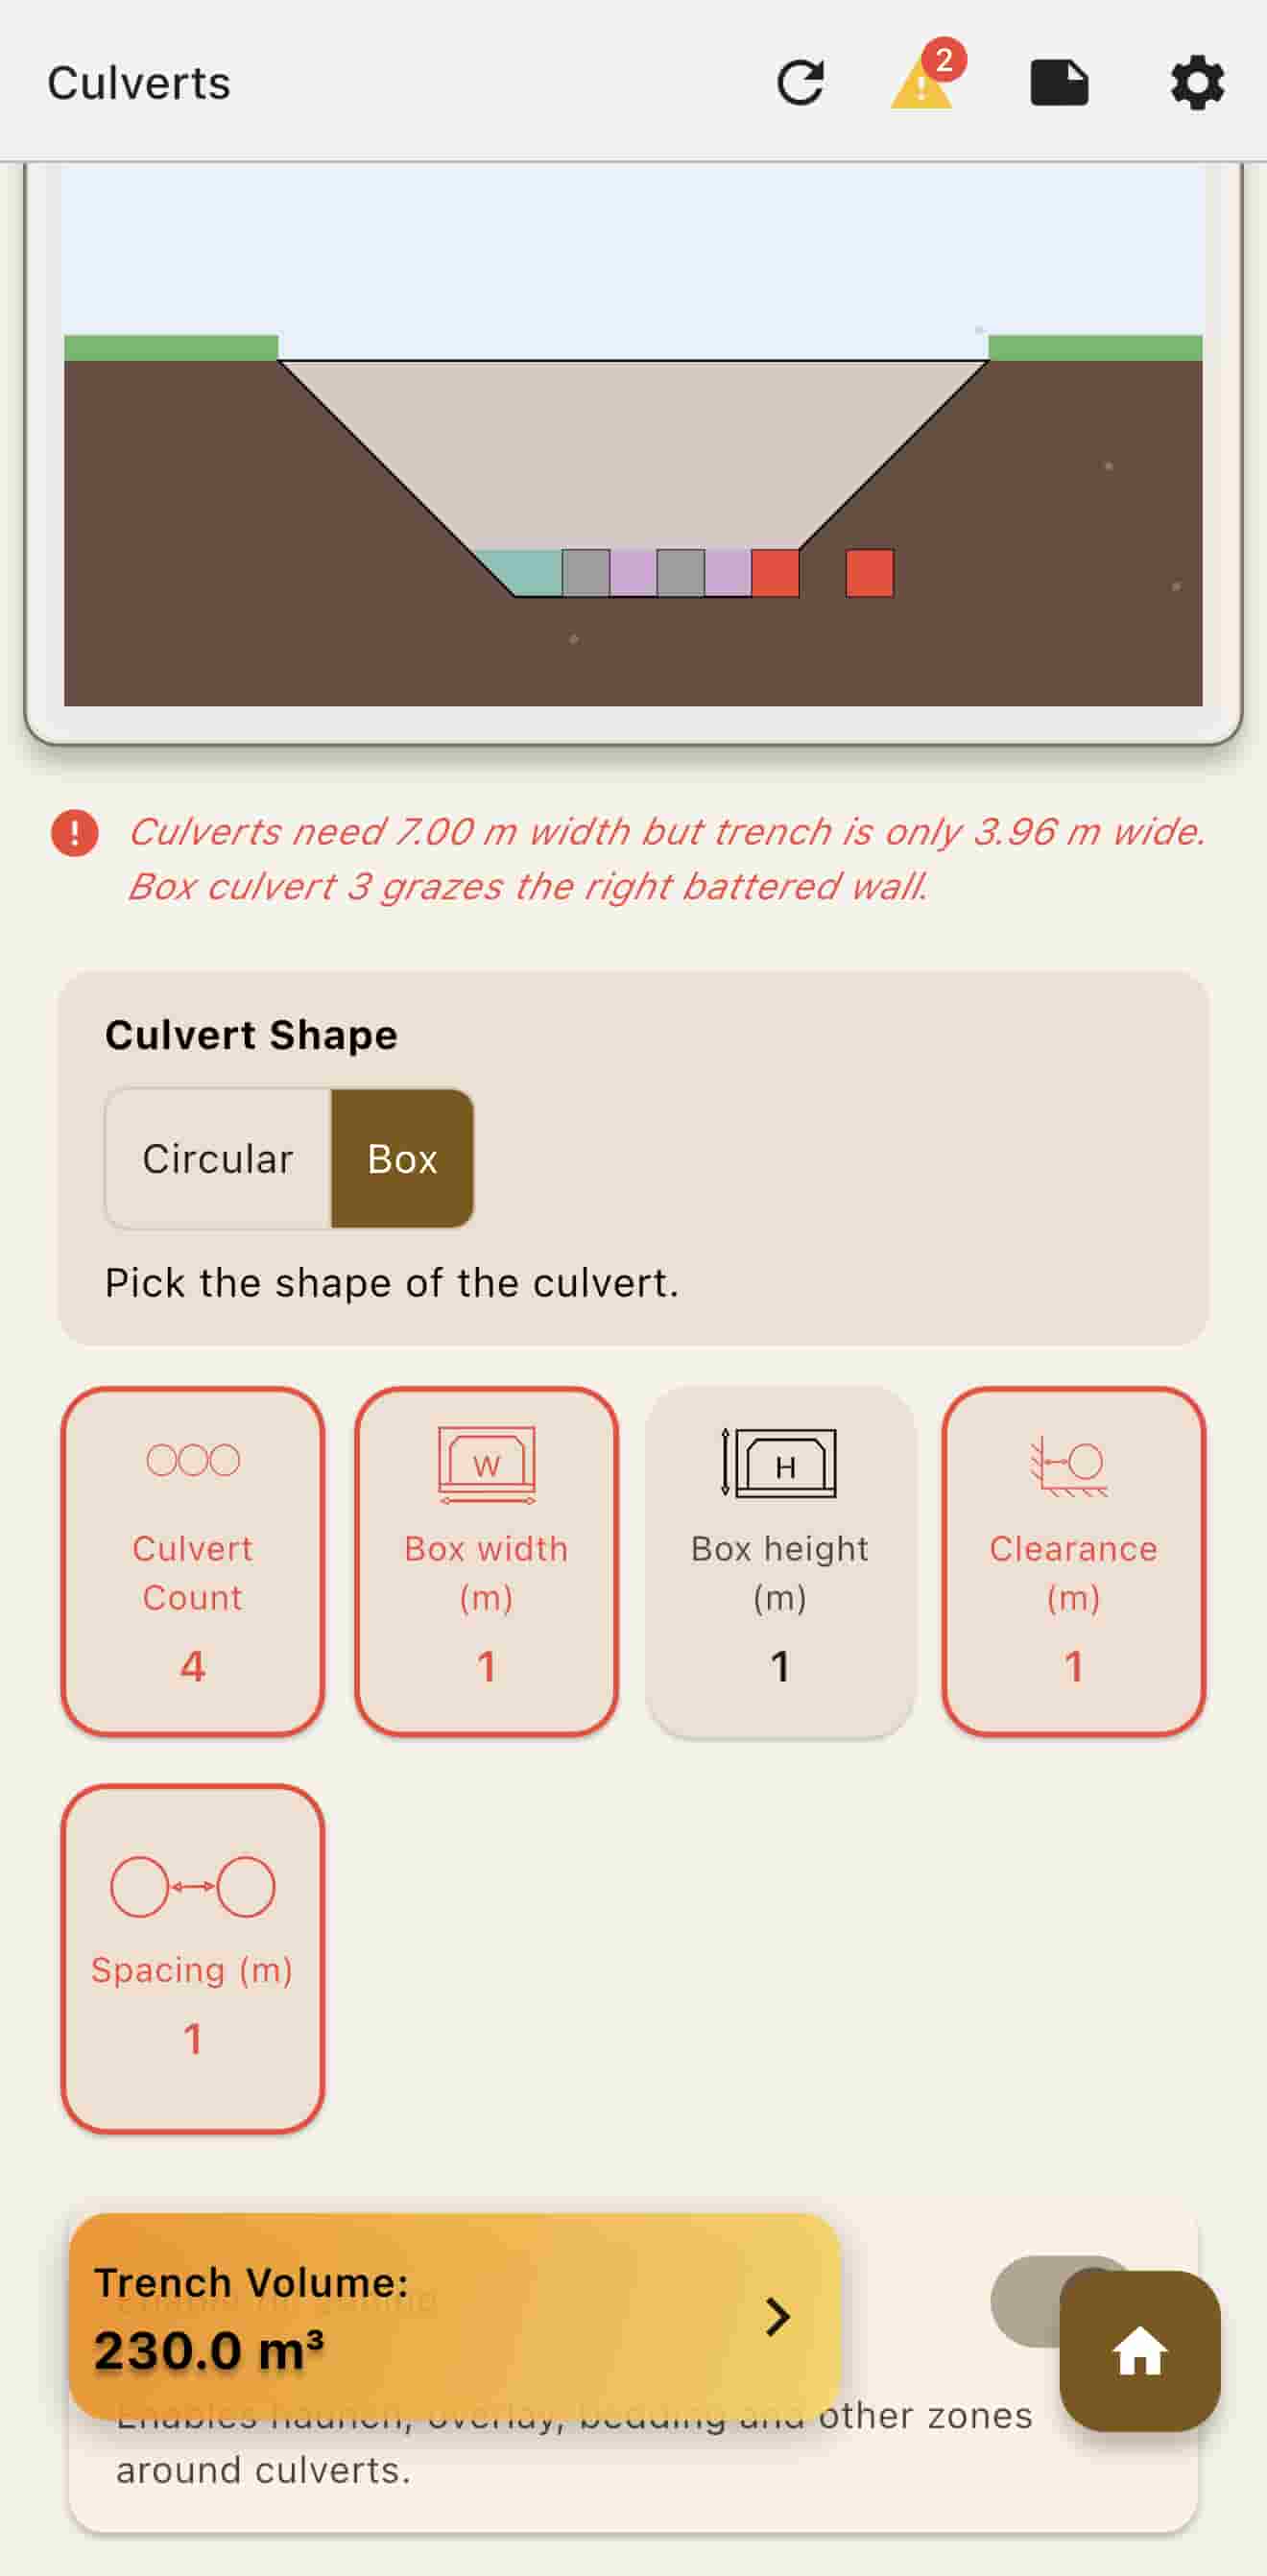
When the zones and culverts fit, the diagram shows a tick and the line “All zone heights are within trench design.” If a culvert sticks out of the trench, the height card and related fields outline in red. Several culverts that cannot fit light up the same way. Zones that are too tall get a warning too.
To change them later, edit the cards, use Reset Culverts to start again, or toggle Enable Fill Zoning.
Saves, summary, and the diagram
Saving
Quick Save. After the trench is entered, open the gear menu and tap Quick Save. That uses the quick-save slot.
Manage Saves. Open Manage Saves from the same menu, tap Save Current, name the trench, and confirm. Cancel leaves it unsaved.
Loading
- Quick Load on the gear screen restores the quick-save slot.
- If you are signed in, Quick Load also appears under Start Trench Setup when the app opens.
- Manage Saves lists every named slot. Tap one to load it.
Loading restores dimensions, materials, and settings.
Summary
The paper icon on the app bar lists dimensions, fill, whether culverts are present, cement settings, wall type, and whether geofabric is used.
Diagram
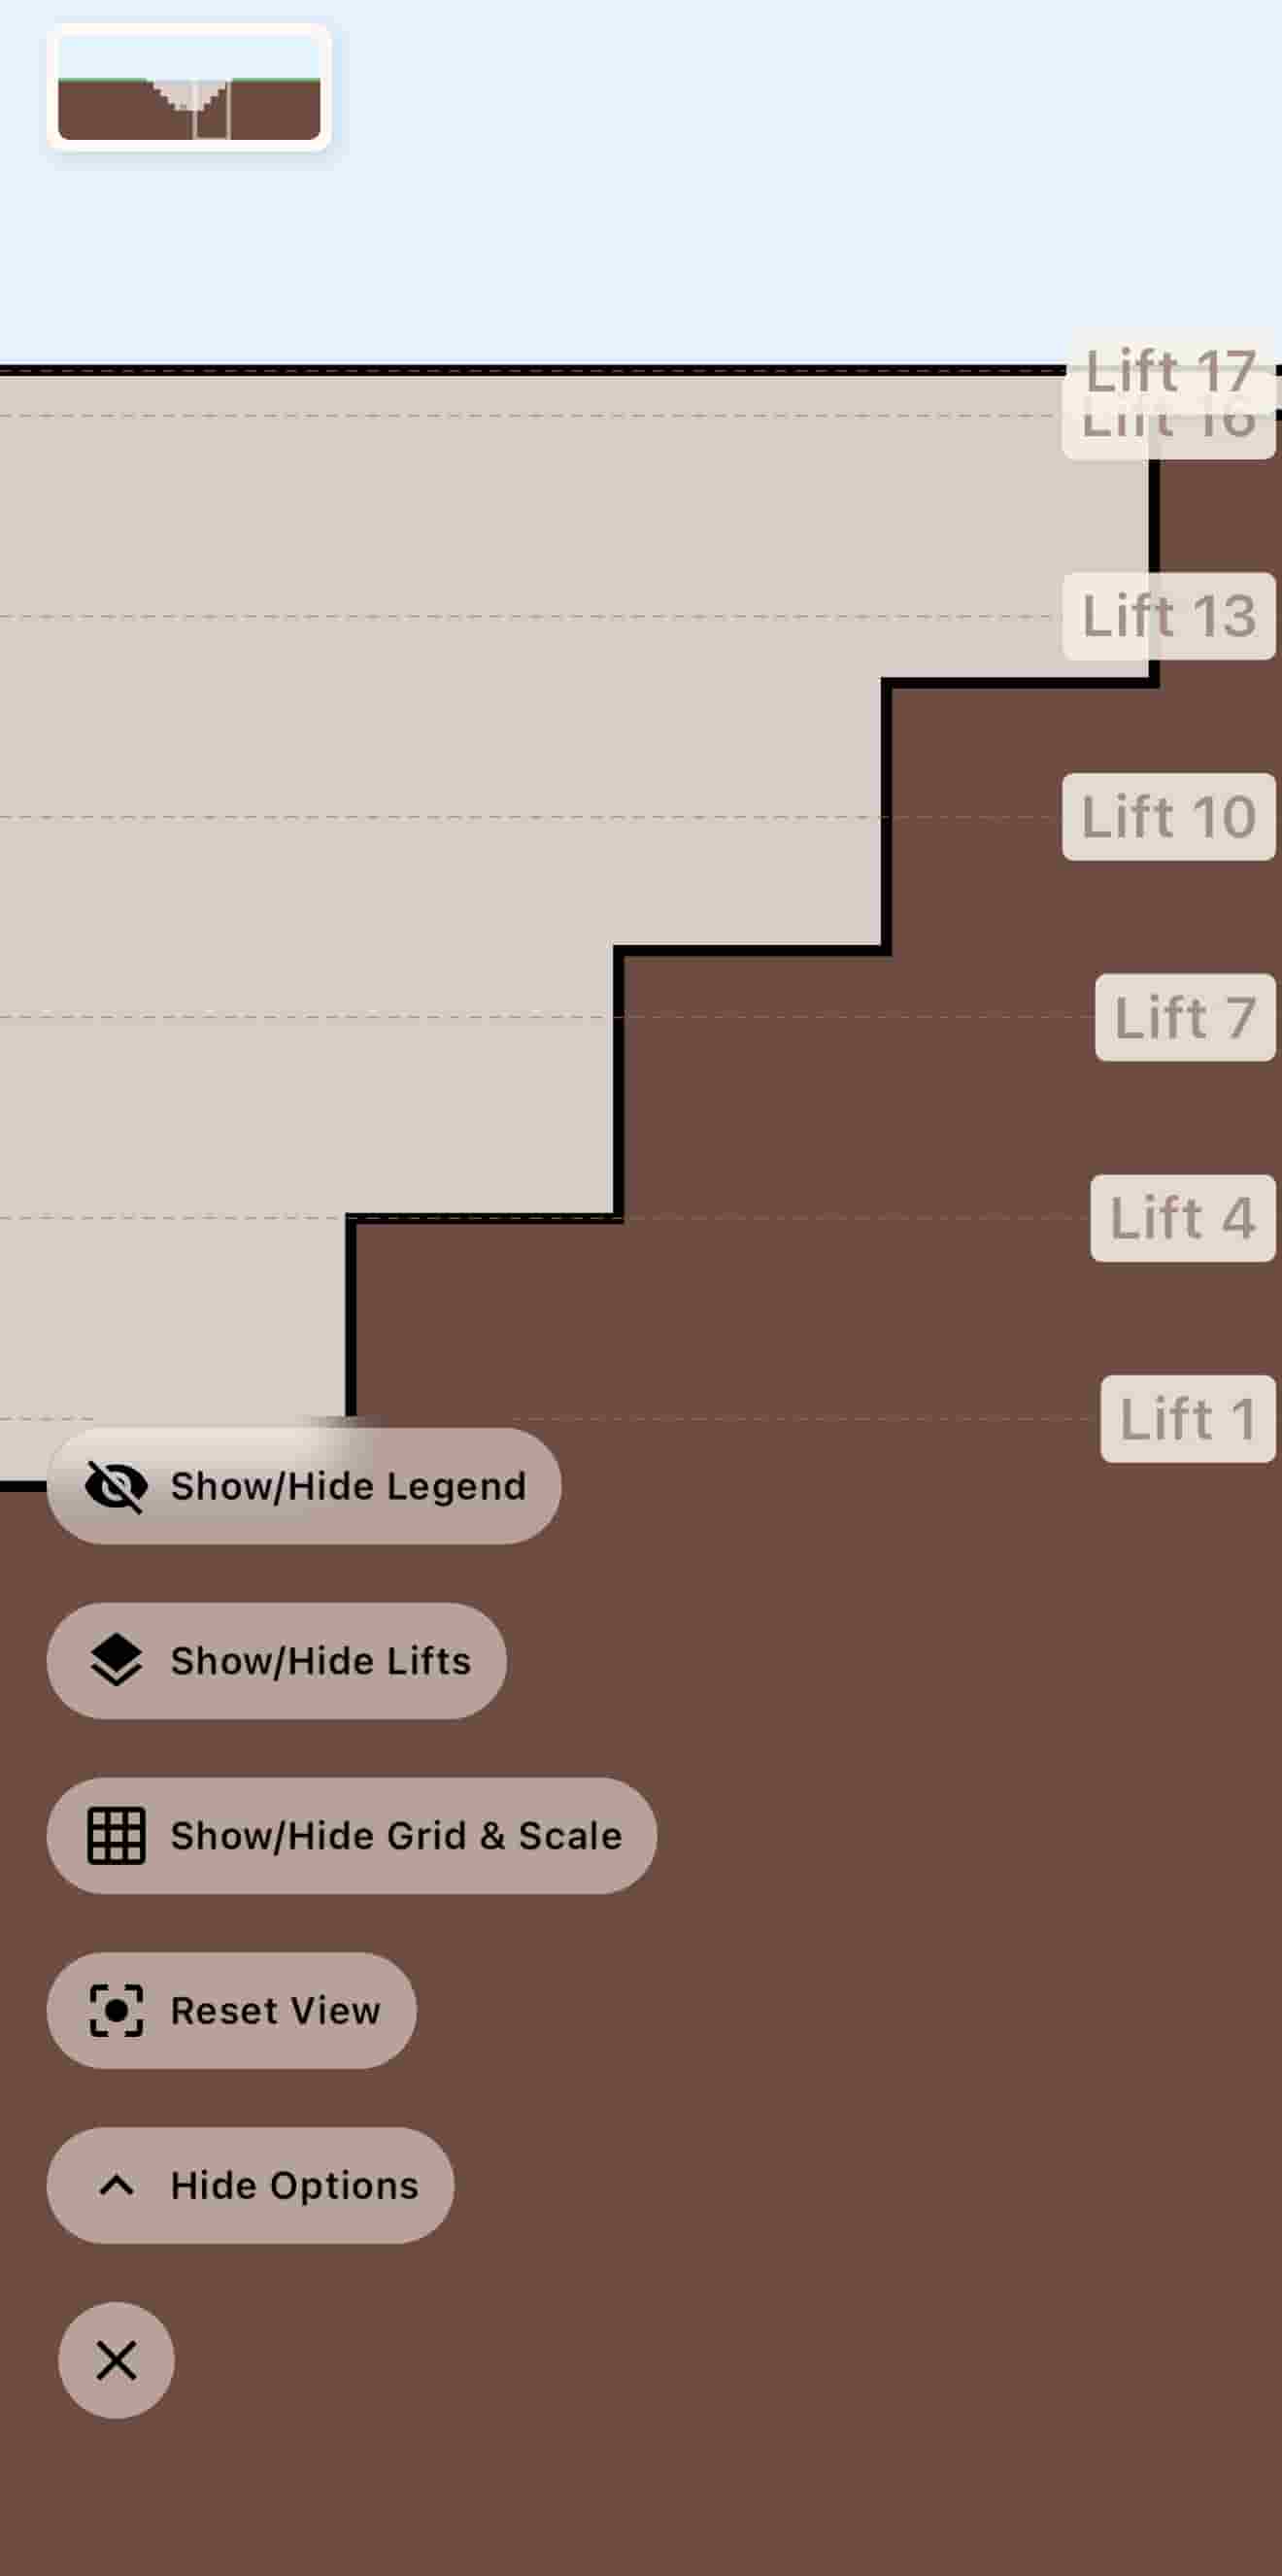
Show or hide the legend, the scale bar, the grid, and lift numbers. Lift numbers are part of Lifetime. Full screen adds a minimap for a closer look. The legend names the zones. A cross-hatch marks cement-stabilised zones. Red means the culverts do not fit inside the trench.
Photos
Photos keep a GPS position, a time, and a direction. A site map is optional and helps on a large site.
- Upload a site map if you want a picture to pin against. Skip it and the app still stores GPS.
- Tap Take Photo and capture the shot.
- Name it, for example “North excavation, day 1”.
- If a site map is loaded, drop a pin where the photo was taken.
- On the preview, the corner shows coordinates, date, time, and facing direction. The name sits along the bottom.
- Save to Camera Roll to keep the annotated photo in the phone’s gallery.
- New Photo starts another one.
Site survey
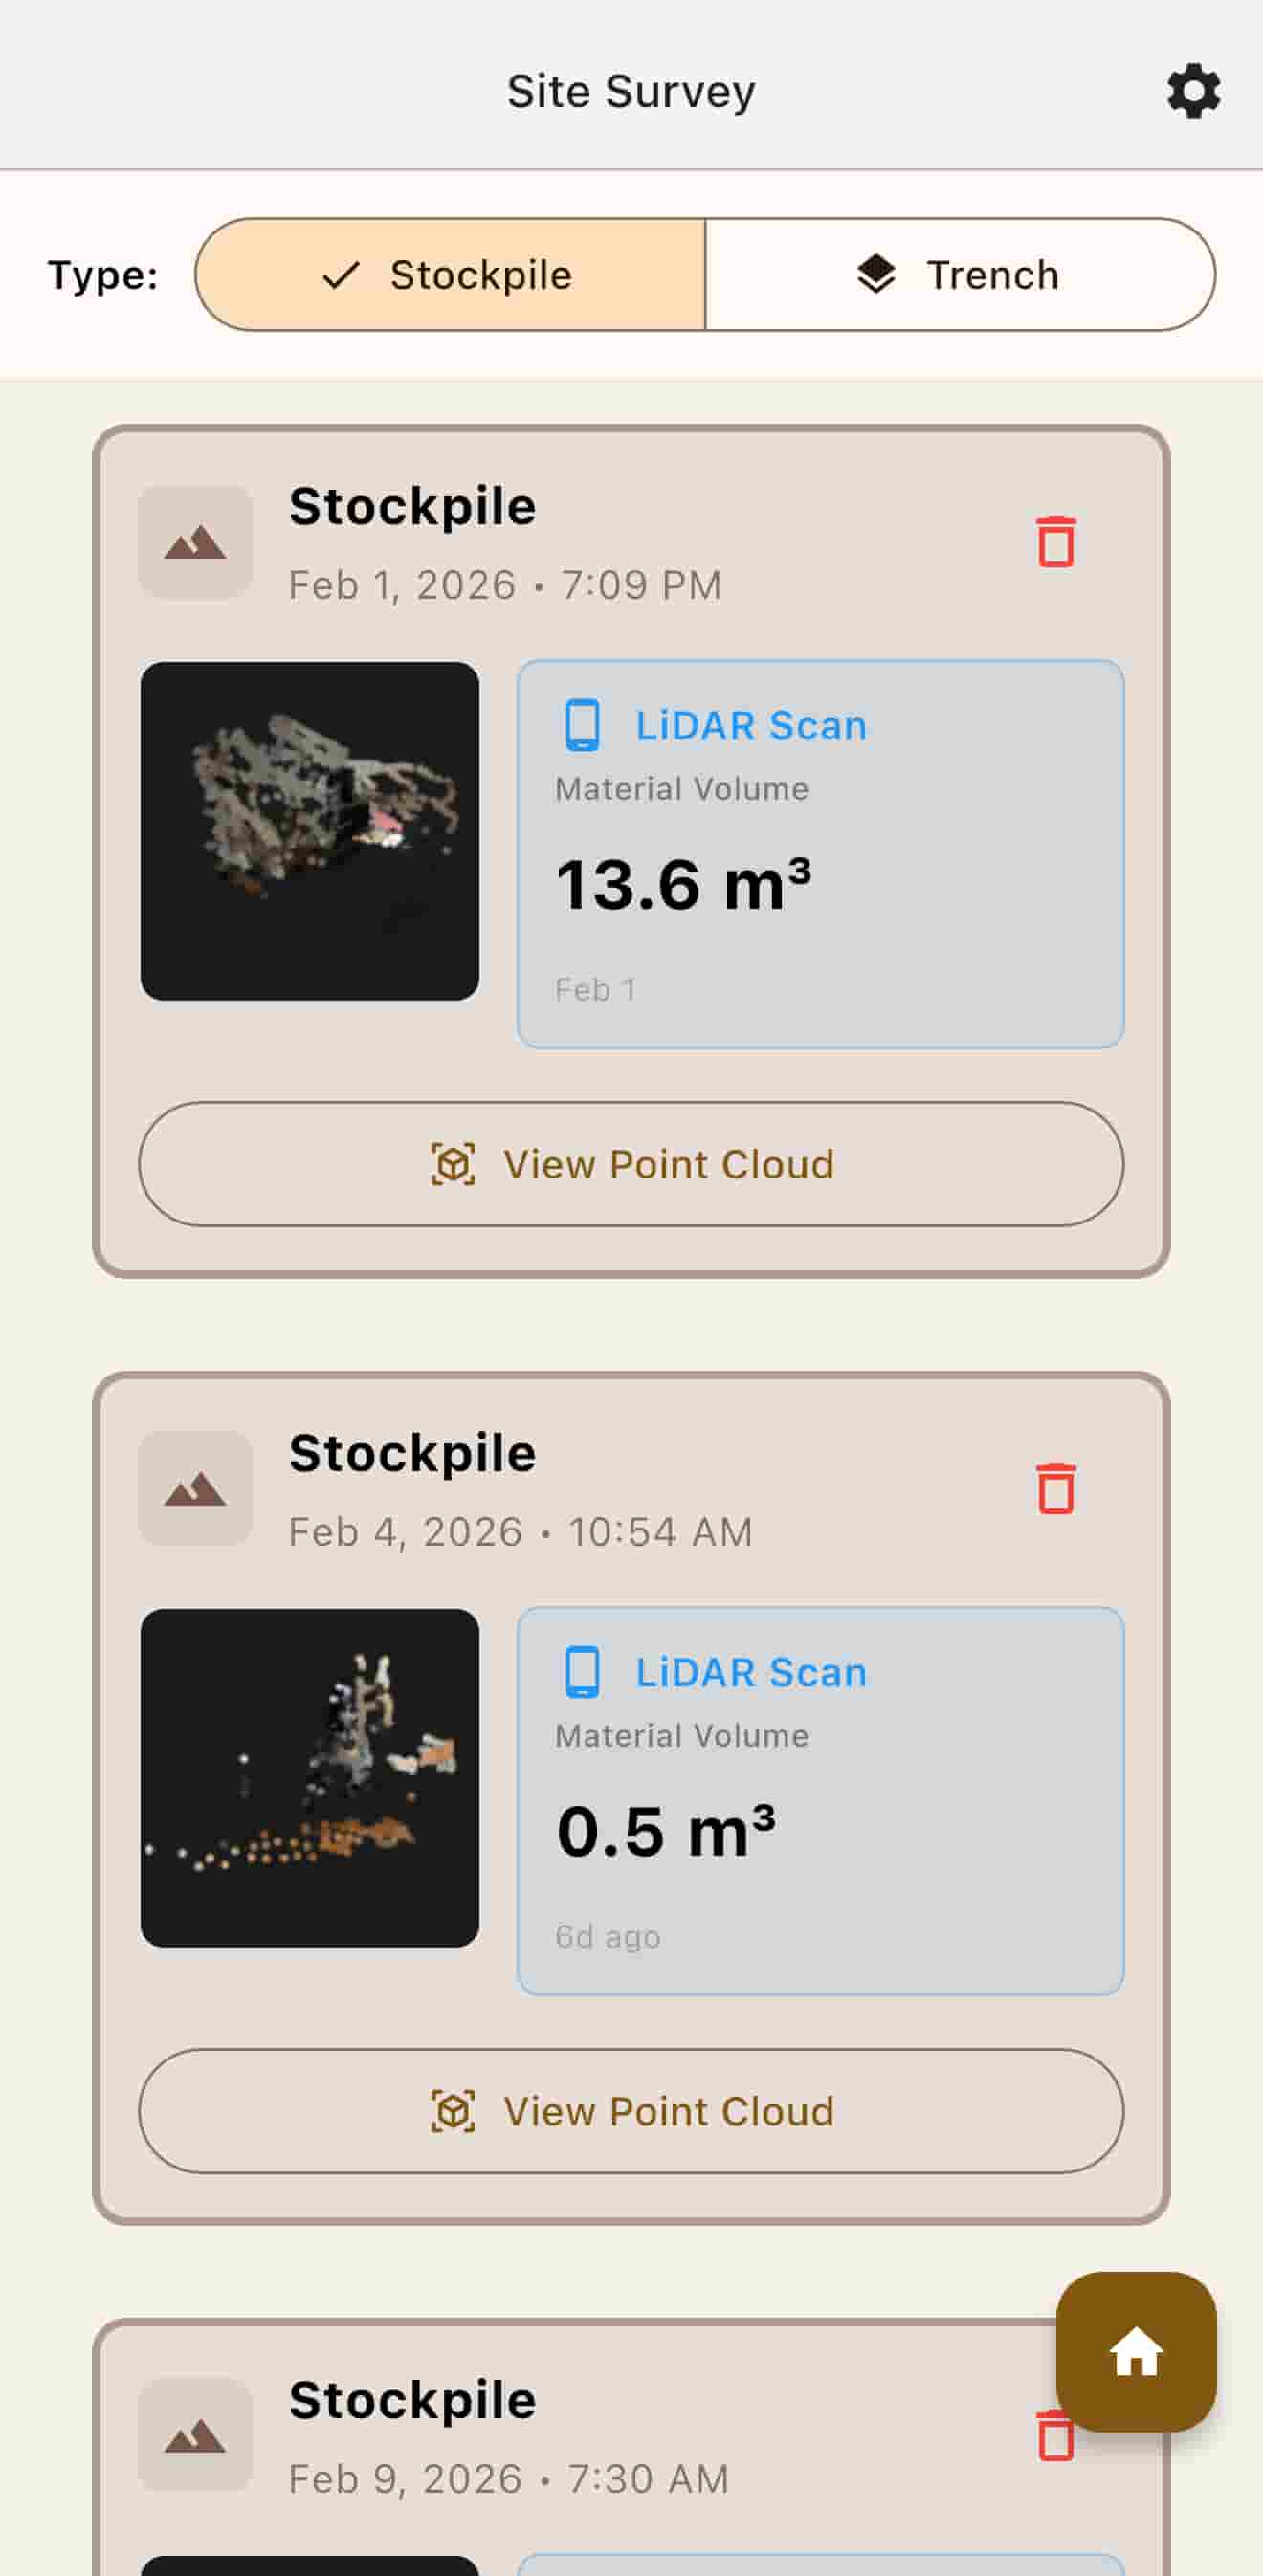
Site Survey uses LiDAR to build a point cloud of a stockpile or a trench and estimate the volume on the device. It needs an iPhone 12 Pro or later, or an iPad Pro 11" or 12.9" (3rd generation or later).
- Choose Stockpile or Trench. That choice changes how the cloud is turned into a volume.
- Tap New Scan to open the camera.
- Tap Start Scan. Dots appear on the camera view. The corner counts the points. Move slowly around the shape.
- Tap Stop Scan. After processing, the Site Survey screen shows an estimated volume.
Questions
Can I use TrenchCalc offline?
Some paid features need a connection. Check the feature you are using if a result will not update away from the network.
What units are supported?
Metric and imperial. Switch them in settings. Dimensions, density, and the other inputs follow that choice.
How do I cancel a subscription?
There is no subscription. Lifetime is a one-time purchase. Store purchase history is the place to review it. See features.
Can I export my data?
Yes. Export writes the material breakdown and the zone breakdown, as volumes and masses.
What is the difference between Free and Lifetime?
Free is Basic, Fill, and Wall, plus the truck load calculator. Lifetime unlocks all 12 tabs. The table is on the features page.